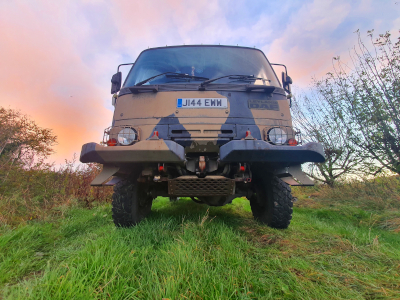
Army Truck Camper Conversion
The full details about why I built my own army truck camper, how I got the truck on the road, and how much the whole conversion cost.
It all started back in 2015, I was camping with the guys in Scotland and we found an absolutely amazing wild camping location. It was on the top of a hill and overlooking the East coast of Scotland. And while we were pitching our tents, we admired a beautiful loch with fishing boats scattered around the edges. The grass field we were in had just been cut and the farmer had literally just bailed the hay, it was perfect. I sat by my tent and thought how amazing it was and how great it would be to holiday like this, but while still having the luxuries of an apartment. A shower, somewhere to cook and somewhere to relax, plus a normal bed and not my inflatable mattress I took on that camping trip.
Why I Chose An Army Truck
I returned home after my camping trip in Scotland and started searching the internet for a base vehicle which was big enough to carry an apartment full of essentials, but also with off-road capabilities. At first I saw military trucks such as the American M1079 and then some old British Army Bedford trucks. But when I found the Leyland DAF T244 I knew, with its 4x4 capability and simple design, my search was over.

An army truck camper conversion was the obvious solution. With most ex-military vehicles being very well maintained, and only lightly used compared to their civilian counterparts, I could get a lot of truck for my money. A truck that was capable of driving off-road, could carry ample supplies, was reliable, and would hopefully last years to come. I wrote a blog post detailing the specifications of my army truck and modifications I’ve made.
Purchasing An Army Truck For Conversion
When I came to purchase an army truck back in 2016 I was fortunate that the military had released thousands of the Leyland DAF T244 4x4 from service and they were being sold in high numbers, every week. I spent ages watching the auctions at Witham Specialist Vehicles and visited their site in Grantham. After a couple of visits and some bidding I found a truck which seemed perfect. As with most ex-army trucks it was rough looking on the outside, but importantly, it was clean on the inside, rust-free and had clearly been looked after.
The auction process was easy! At the time Witham had the contract with the government to dispose of these military trucks, and many were being shipped around the world or sold through online auctions. The vehicle was straight from service, though most had been parked in storage for a number of years before actually being sold. I paid my money, transport costs and then the truck was delivered to me.
Storage And Parking For My Conversion
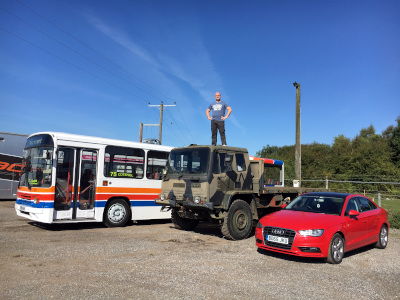
Many people have complained that their efforts to find suitable parking in the UK for such a large vehicle has been tough. At the time when I bought my army truck I already had a single-decker bus, which I’d restored, and so parking my new truck was easy. I rent a small space in a transport yard to park my vehicles and so the truck joined the bus there. I had previously moved from a boat yard nearby, but prior to that I’d searched for parking and was pleased with the offers from farms, caravan parks and pretty much anyone with outdoor space to rent. The key is to look around, ask around, be polite and respectful.
Start Of The Truck Camper Conversion
Because I bought directly from the military, I effectively bought a truck with no civilian registration. In order to get my vehicle on the road, even before I’d converted it into a camper, I had to jump through a few small government hoops first. Firstly, I needed to register it, and in order to get that I had to take it for its first annual test. That’s right, my truck, which was 25 years old when I bought it, had never had an annual MOT test. At least not as we know it. Plus, because it was now a civilian commercial lorry, it had to meet civilian rules and therefore I had to fit LGV side guards. These side guards effectively stop cyclists riding under the truck, useful I think.
First MOT test complete and I still wasn’t legally on the road yet. Although I had insurance, this was on the vehicle’s chassis, since I’d not been assigned a registration number. I now had to collect all my application forms, certificates and military vehicle release papers and post to the government in order to be assigned a registration number. Within a few weeks my papers were returned and I was given permission to have number plates made. This all sounds like a bit of a faff now, but in reality it was a simple enough process.
Which Box For The Camper Conversion
With the truck now on the road I enjoyed many hours just nipping around in my post-apocalyptic transport. Even as a flat-bed truck, it was a head turner! I wrestled with so many ideas of how to build a box for the base of my camper. My options were: Buy GRP insulated panels and build my own box, to my specifications. Convert a fridge or panel box from a civilian truck. Or, convert an ex-military truck communication/workshop body into my habitation box.
Buying my own insulated box, specifically designed to my needs was my main idea from the start. I could have the size, insulation and layout exactly to my needs. I found a manufacturer of the panels conveniently located near where I live, and the owner showed me around their workshop and explained exactly how it all worked. Even now they still sound perfect. The problem is that putting the panels together is a 4/5 men job, and I wanted to do this build myself. Plus, the cost of doors and double glazed windows to fit into the panels was astronomical. The other options just didn’t quite suit either though, the military communication boxes were low height and both these and the workshop boxes had rounded roofs. The civilian boxes were often too high and I’d still have the cost of doors and windows. This is why I owned the truck for 2 years before I eventually found my box...
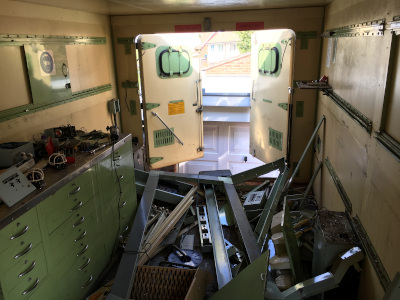
After 2 years of searching, 2 years of checking military auctions, and 2 years of moaning to my wife about the lack of propulsion for my camper build. I eventually stumbled upon the perfect design. On the military auctions came a workshop body, it was made of GRP, had double glazed windows and was very well insulated. It had a flat roof, 2 metre internal height and a door on the passenger side of my vehicle. The box was originally designed to be carried by my truck and was super strong, over engineered, a diamond in the rough. To this day I’ve only ever seen 2 of this type of box and I know of the other person to have the other. I felt very lucky, but I think I paid for that luck, since the auction went for 3 times more than a standard workshop body.
Skills Required To Build A Camper
I’m no engineer, I’m no carpenter, not a professional welder, I’m not a plumber or an electrician. I’ve never built a camper in my life... But, I am a bit of a Jack of all trades, master of none. I’m not scared of giving something a go and I think I have a good grasp of common sense. With all that said, if I don’t know how to do something I just Google it. YouTube and Google have been my working buddies throughout this DIY camper truck build, them and a very good book on building an overland camper. Clearing the inside of my box was the easy bit; I just set off with an angle grinder. Building the internals takes planning, thinking, planning and time. If I spent an hour building then I probably spent 2 hours planning that part of the build first.
Tools Required To Build A Truck Camper
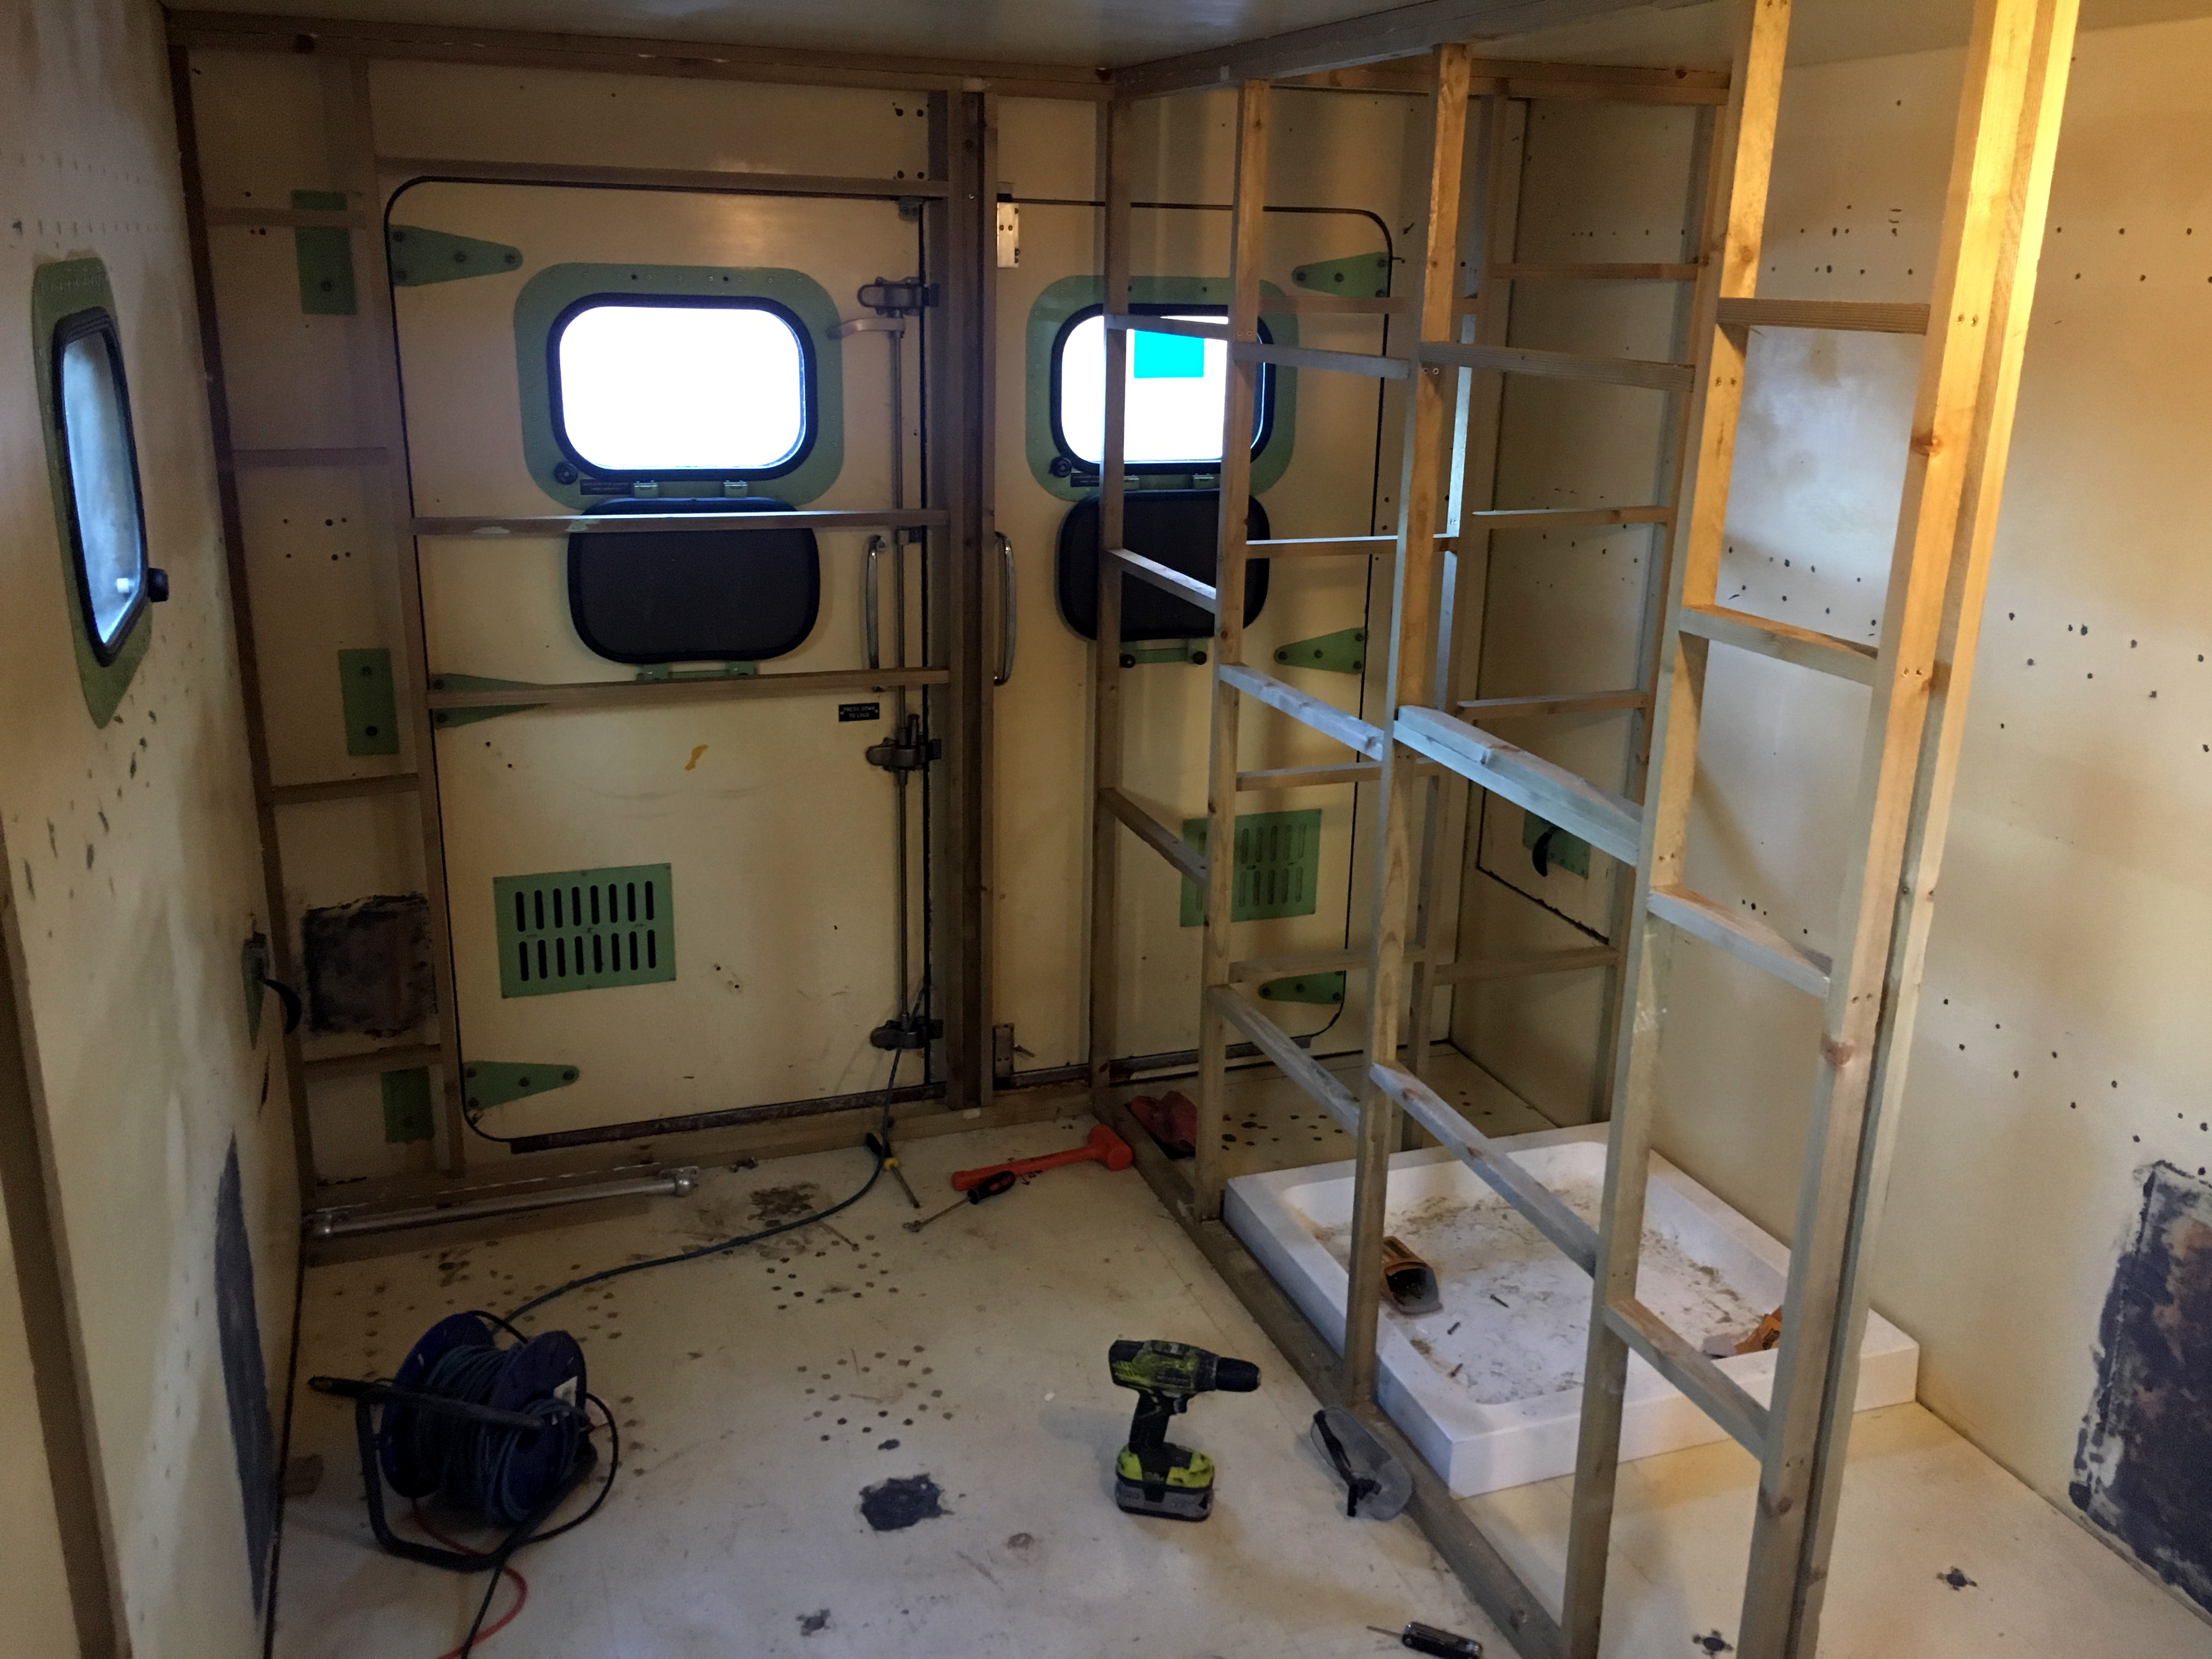
Working from a rented yard space or the driveway of my house, there were numerous tools which of course I could not have finished this truck conversion without. Listed in order of appearance during the build:
Makita Angle Grinder – Such a versatile tool, I used it for everything, from cutting rivets off to shaving fibreglass. Such a good tool that I bought its bigger brother too.
Ryobi Drill – How this drill has taken so much abuse from me and is still working is beyond my comprehension. When I eventually upgraded the Ryobi team to an impact driver too I made huge strides.
Ryobi Impact Driver – Pre-drilling holes for wood and then screwing gets dull, but the difference an impact driver makes is huge. I learnt the power of an impact driver on YouTube and never looked back.
Titan Table Saw – Game changer when I came to cutting the smaller pieces of edging and making the camper internal door frames. I couldn’t get along with the saw guard though so I removed it.
Bosch Random Orbital Sander – Another tool which I picked up again and again and... well you get it. I’ve used this for sanding everything, sheet wood, the fibreglass walls, edging, door frames etc. Cheap to buy, the discs are super cheap and it doesn’t throw disks off like others do.
Blood, Sweat, Tears and Phone Screens (Balance of time)
Something which I think gets missed off of balance sheets when people talk about building or converting an army truck into a camper truck is the balance of time. Immediately when you think of cost you start calculating the Pounds, Dollars, Euros or whatever currency is used. But building this camper truck of mine has taught me that it’s not the only exchange. The time taken to build this has taken time from me with my young family. As I’m drilling or cutting I often hear the calls (sometimes cries) from my family and it’s hard not to always drop the tools and return to them. The greater good is an expression I think I’ve been heard saying to them when explaining my disappearance. As I write this my habitation box is just about complete, though still with some finishing touches remaining, and it’s taken me 2 years to complete, and I’ve owned the truck 4 years. I’ve learnt lots of skills during the build, but I’ve also missed out on lots of family time.
It’s also worth noting that I’ve sawn into my skin with a circular saw, cut myself with an angle grinder, been covered in sweat and dust numerous times, and have broken 4 mobile phone screens while building this ultimate adventure vehicle. Fortunately for me, I’ve only been left with a small scar and the cost of replacing the phone screens. My family are still intact.
Costs To Build
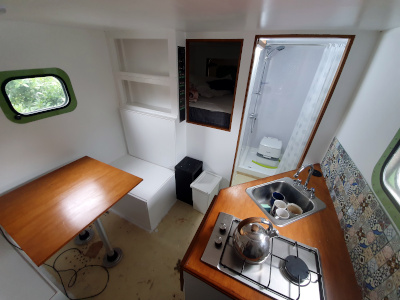
The difference in material cost between building your own army truck camper compared to having a professional company build one is vast. I’ve heard of builds similar to mine costing individuals from £60,000 to £150,000 and more. The difference is often the specification made, but I’m more functional than flashy and so my build reflects that. My costs haven’t been meticulously recorded, as I spent my time planning and building rather than recording. But as a good base of figures to understand what’s involved, the below is a guide to the costs of building a DIY off-road camper from an army truck. I’ve reused materials where possible and bought some items second-hand.
- Leyland DAF 4x4 Truck (Delivered ): £2,930
- Ex-Military Workshop Body: £4,000
- General Build: £3909
General build includes all timber work, electrics, paint, etc (everything required to build a minimum standard). - Heating and Water: £1467
- Kitchen Area: £879
- WC: £291 (Includes shower, toilet, waterproof lining, etc)
Total cost for an army truck camper conversion with habitation box build: £13,476.
This cost covers the build up to a useable overland camper truck but my plans do extend beyond this and I still have the outside to paint. However, I don’t plan to spend more than a few hundred pounds on painting.
Costs to Run
I have a diesel car that achieves around 55mpg (5 L/100km) on average, over all types of driving. I’m pretty pleased with that, and I drive all over the country for work. My diesel Leyland DAF T244 ex-army camper truck achieves only 15mpg (18 L/100km). Now, initially that does sound like a lot of fuel to burn driving around in what is now a camper. But when you think about it, on an average 2 weeks holiday I might travel 1600 miles (2575km). In fuel this distance would cost £550. When I consider what I’m getting for that price, it’s 2 weeks accommodation for 4 people, plus transport. The accommodation includes a full-size shower, double bed, bunk beds, seating area and table for 4, and cooking facilities. You couldn’t get hotels for anywhere near that price. For comparison though, my car would cover the same distance for just £150 in fuel.
Other factors to also consider are service costs. For every year I use the truck for travelling, I service the truck myself, and that costs £160. Parking costs me £75 a month, or £900 a year. Tyres aren’t cheap and can be around £500 a wheel, which there are 5 of, since you have to carry a spare. Fortunately, I’ve found 5 brand-new tyres for mine and paid only £60 a tyre. Bargains are out there if you’re willing to spend the time looking. Insurance costs me around £250 a year. Road tax, as it’s a private HGV, cost £140 a year. General maintenance of the truck is to be expected and parts can vary in price, but now some spares are becoming harder to find for a vehicle from 1992.
Epicness
Probably the most important factor to consider when building an army truck camper, completing the conversion to camper truck and creating the ultimate adventure vehicle, is the epicness of what is achieved. Wherever I drive my truck I have people coming over to talk to me, it’s like a magnet for conversation. I’ve been stopped in petrol station forecourts, families stop in their tracks and point together in awe, and every neighbour in my street will strike up a conversation about it when passing. When I travel down the road, beaming with a smile myself, I can’t help notice the passing drivers also looking over.
If you’re interested in this sort of stuff and want to see more of it, subscribe to my YouTube channel and follow me on Instagram and Facebook. I’ve also covered the specifics of my truck in another blog.
